中文 (中国)


如何在 Ubuntu 上安装 GitLab
GitLab 是一个强大的开源 DevOps 平台,用于管理 Git repositories、CI/CD pipelines、code reviews 等。它被开发者和团队广泛采用,以简化软件开发和部署。在本指南中,你将学习如何在 Ubuntu server 上安装 GitLab。
先决条件
在开始之前,请确保你具备以下条件:
- 运行 Ubuntu 20.04 或更高版本的系统
- 至少 4 GB of RAM 和 2 CPU cores(生产环境建议使用 8 GB RAM)
- Root 或 sudo 权限
- 域名(可选,但建议)
- 静态 IP 地址
步骤 1:更新系统
首先,确保你的系统软件包是最新的:
步骤 2:安装所需依赖
GitLab 需要预先安装一些依赖:
你还应该安装 Postfix 用于发送电子邮件通知(或选择其他 MTA):
在安装过程中,提示时选择 “Internet Site”,并输入你服务器的 hostname。
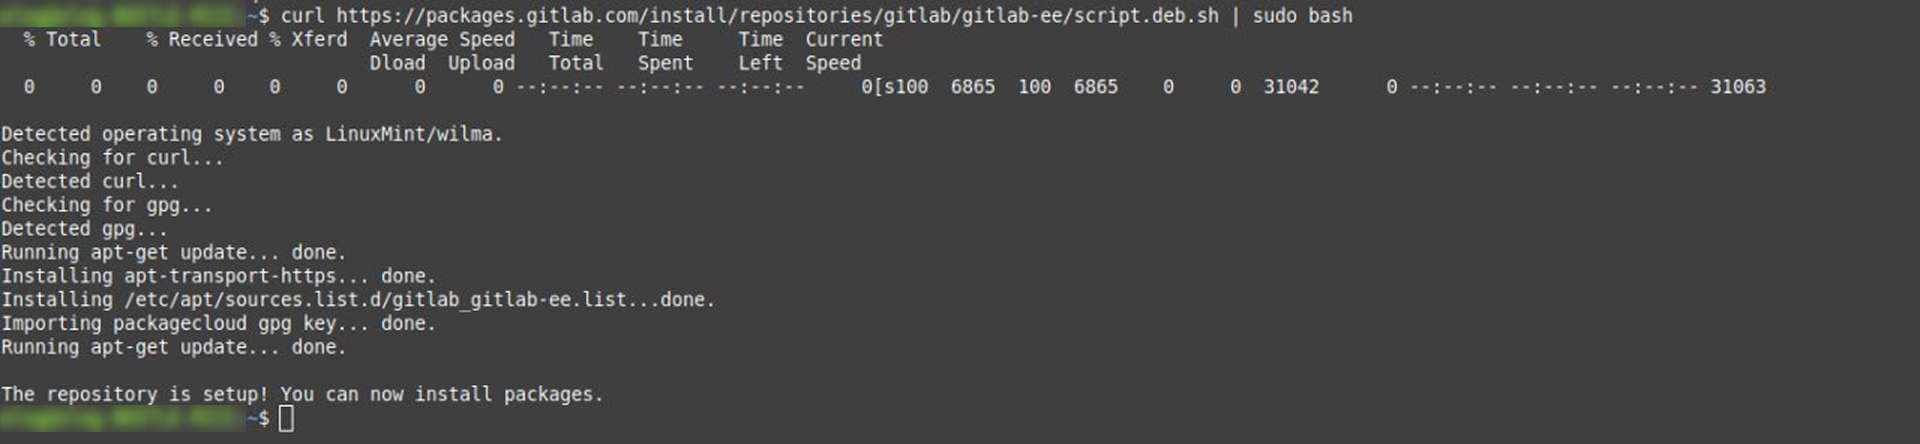
步骤 3:添加 GitLab repository
使用官方 GitLab 安装脚本添加 repository:
curl https://packages.gitlab.com/install/repositories/gitlab/gitlab-ee/script.deb.sh | sudo bash
注意:这会添加 GitLab Enterprise Edition repository。如果你想要 Community Edition,请在下一步中将 gitlab-ee 替换为 gitlab-ce。
步骤 4:安装 GitLab
现在通过指定你的域名或 server IP 来安装 GitLab:
如果你没有域名,请改用你服务器的 IP(例如,http://123.123.123.123)。
步骤 5:配置 GitLab
安装完成后,运行以下命令重新配置 GitLab:
这将初始化 GitLab,配置服务,并启动所有必要组件。
步骤 6:访问 GitLab
打开你的浏览器并访问:
首次登录时,你会被提示设置管理员密码。默认的管理员用户名是:
步骤 7:使用 HTTPS 保护 GitLab(可选)
用于生产环境时,你应该使用 HTTPS 保护 GitLab。你可以选择:
手动安装 SSL certificate
在设置过程中使用 Let’s Encrypt
要启用 Let’s Encrypt,请编辑 GitLab configuration:
取消注释并更新这些行:
external_url "https://your-domain.com"
 letsencrypt['enable'] = true
然后重新配置:
步骤 8:管理 GitLab 服务
你可以使用以下命令管理 GitLab 服务:
sudo gitlab-ctl start # Start GitLab
 sudo gitlab-ctl stop # Stop GitLab
 sudo gitlab-ctl restart # Restart GitLab
 sudo gitlab-ctl status # Check status
结论
你已经成功在你的 Ubuntu server 上安装了 GitLab!从这里开始,你可以创建项目、设置 CI/CD pipelines、添加用户等。有关高级配置和使用,请访问 official GitLab documentation。
需要一个针对特定使用场景(self-hosted、cloud、enterprise 等)定制的版本吗?我也可以帮你!
相关帖子